Kitchen remodels and architectural updates offer a rare opportunity to rethink how illumination interacts with your daily routines. When stripping a room down to its studs or replacing cabinetry, most homeowners focus on overhead pendants and central ceiling fixtures. Yet the most challenging zones to illuminate effectively are the tight recesses where walls intersect and deep countertop nooks hide away. Without deliberate intervention, these awkward spaces quickly become gloomy shadows that undermine an otherwise high-end renovation.
Achieving seamless illumination across complex angles requires careful coordination between rough carpentry, electrical planning, and fixture selection. When you address these recessed nooks during the initial structural phase rather than as an afterthought, you can completely eliminate clutter and transform dead corners into visually striking focal points.
Why kitchen and alcove corners need dedicated lighting?
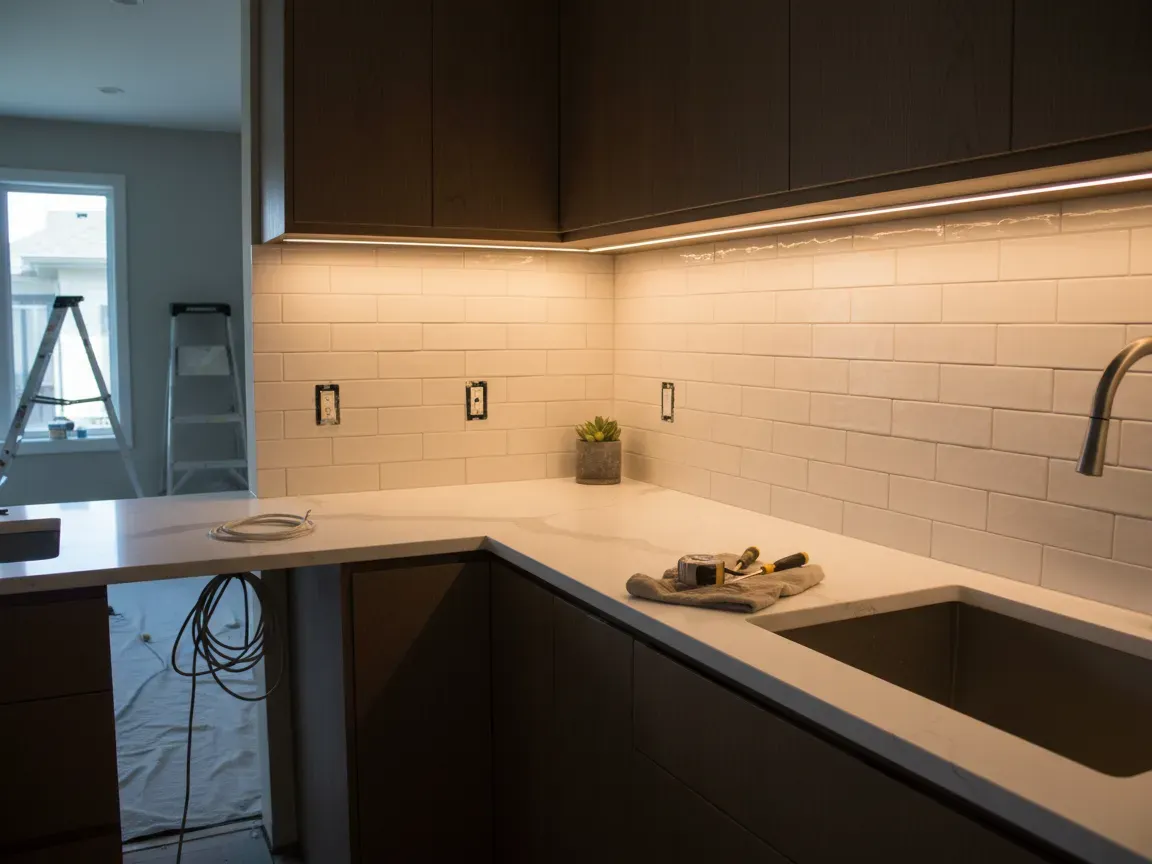
Deep countertop corners, breakfast nooks, and architectural alcoves naturally fall victim to poor light distribution. Standard ceiling recessed cans wash downward in wide cones, but upper cabinetry blocks these beams, casting pronounced shadows directly over the corner prep areas. Working in these dim spots makes reading recipe books or chopping ingredients frustrating and unsafe.
Beyond basic functionality, dark corners visually shrink a kitchen. Shadows pull the boundaries of the room inward, making the perimeter feel cramped and disconnected. When you introduce dedicated accent lighting into an alcove, you bounce light off vertical wall surfaces, which immediately expands the perceived visual depth of the room. A well-illuminated corner highlights custom tile backsplashes, textured masonry, or curated shelving displays, ensuring the entire footprint feels balanced and welcoming.
How planning wiring early prevents exposed cables?
The secret to an immaculate lighting installation lies behind the drywall. Attempting to add task lighting after custom cabinets, quartz countertops, and backsplashes are permanently installed almost always forces compromise, such as surface-mounted raceways or messy plug-in transformers running to visible backsplash outlets.
During the rough-in stage of your renovation, map out every lighting zone with your electrician. Specify low-voltage drivers hidden in central, ventilated locations like a utility closet, the attic, or inside an upper pantry cabinet. Running Class 2 low-voltage wiring through the wall studs directly to the exact point where each cabinet meets the corner keeps power delivery entirely invisible. By pulling these lines before drywall and tile go up, you ensure that only clean, continuous beams of light remain visible, with zero hanging cords or bulky adapters disrupting your clean lines.
Best mounting options for angled aluminum channels
Exposed flexible strip lights produce unsightly glare and reveal bare diodes that look unfinished. To protect the electronics from kitchen grease, heat, and steam, linear strips should always be housed within rigid extrusions. In tight nooks where a flat fixture would merely cast light back against the wall, choosing a specialized corner LED profile allows you to mount the fixture flush into a 90-degree intersection and project light outward at a comfortable 45-degree angle.
This angled orientation delivers uniform illumination across the entire work surface below while shielding your eyes from direct glare when seated nearby. Extrusions can be mounted securely using concealed clips, high-bond architectural adhesives, or countersunk screws hidden beneath the diffuser lens. In custom millwork, you can even route a shallow channel directly into the underside of the cabinetry or shelving for a completely integrated, flush architectural appearance.
Choosing the right color temperature for task and accent zones
Light quality depends heavily on color temperature and color rendering capabilities. In a kitchen setting, selecting mismatched tones between your main ceiling fixtures and your corner accent strips will make the room feel disjointed. For a cozy yet functional atmosphere, a warm white setting around 2700K to 3000K complements natural wood finishes, warm stone countertops, and soft paint palettes without feeling sterile.
If your kitchen leans toward modern minimalist design with crisp white quartz, cool marble, and stainless steel appliances, a neutral white around 3500K to 4000K provides crisp, energizing clarity for food prep. Regardless of the kelvin rating you pick, always prioritize tape lights with a high Color Rendering Index (CRI 90 or above). High CRI values ensure that fresh produce, natural stone veining, and cabinet colors appear vibrant and true to life rather than dull and gray.
Mistakes that ruin clean lighting lines in tight spaces
One common oversight during corner installations is failing to plan for continuous runs through 90-degree turns. Cutting extrusions without precise miter joints results in awkward gaps where unshielded light spills out or dark dead spots interrupt the continuous glow. Use a fine-tooth miter saw to cut both the channel and the diffuser lens at matching 45-degree angles so they join seamlessly in the corner.
Another frequent misstep is pairing low-density LED strips with transparent covers. This combination creates distracting bright dots, often called the hotspot effect, which reflect glaringly on polished granite or glossy subway tile. Choose high-density strips, such as COB (Chip on Board) tapes, coupled with frosted or opal diffusers to achieve a completely smooth, continuous ribbon of light. Lastly, always account for voltage drop on long runs; undersized conductors or excessive distances can leave corner fixtures noticeably dimmer than the rest of the array.
How to achieve a flawless finish in your updated space?
Thoughtful lighting design transforms everyday routines by turning awkward nooks into practical, inviting workstations. When you treat corner lighting as an integral architectural component from day one of your renovation, the end result feels intentional and elevated. Coordinating hidden power supplies, choosing angled channels, and joining diffusers with precision guarantees that your kitchen functions as beautifully as it looks.
Taking the time to install dedicated accent lines now safeguards your investment for years to come. By eliminating shadows and exposed cables, your renovated kitchen and alcoves will maintain a clean, sophisticated atmosphere that enhances both your culinary prep and your home’s long-term value.